Final Project
For my final I sketched out an underwater scene. This piece's meaning is that if we focus too much o the little thing we will miss the bigger picture. I learned how to create and draw animals that I have never experimented with before and gained a lot of experience from it. I used used texture when making the hair and jellyfish. I also used direction where i have everything facing one the scuba diver. I had a lot of fun with this project and hope to do similar things.
Abstract Art
In this project we created an abstract piece by using oil pastels. We first followed 21 steps that said things like, making a curved line, draw using you favorite color, or draw a certain shape. After we followed the list of instructions we got to add whatever we wanted. I liked the freedom of this project, as in how we got to make it our own. I think I would have have done better if I had a better understanding of the technical aspect of using the pastels and how to plend better.
For this project we painted a impressionistic paintings. Impressionistic paintings are like a blurry picture. To start off we practiced brush strokes and different methods like wash painting and dotting. Then we found a picture to base our painting on and made a sketch off it. Finally we painted! I liked this project but I think I could have done a better job if I had a bigger picture of what I had planned.
Tessellations
In this project we are making tessellations. To start you make a design that can be based from a certain shape, (Square, triangle, ect). When making the design make sure do do the opposite on the other side. ALso make sure to make it into something, in other words don't just make simple shapes and color them. I personally think this project is interesting and I feel like I could have done better if I had more time and a better understanding.
Alebrije clay project
In this project we are making Alebrije clay sculptures. We have to make them have a purpose (pot, mug. vase). We also have to combine three animals. I chose a dog, rhino, and a fish to make a piggy bank. I hope to gain a better understanding of clay and improve my skill at it.
Think Outside the Box
In this project we are thinking outside the box! We are creating an image based on a magazine piece we receive. We have make the piece blend into the paper by using colored pencils. This project will help us learn how to color match. It also have to contain most of the elements of design.
Final Project
For our final project we got to choose what we wanted to do. I chose to draw a girl in a window. I tried to challenge myself by using more value in shading and using my imagination. I hope to gain more experience in sketching and realism in more projects to come.
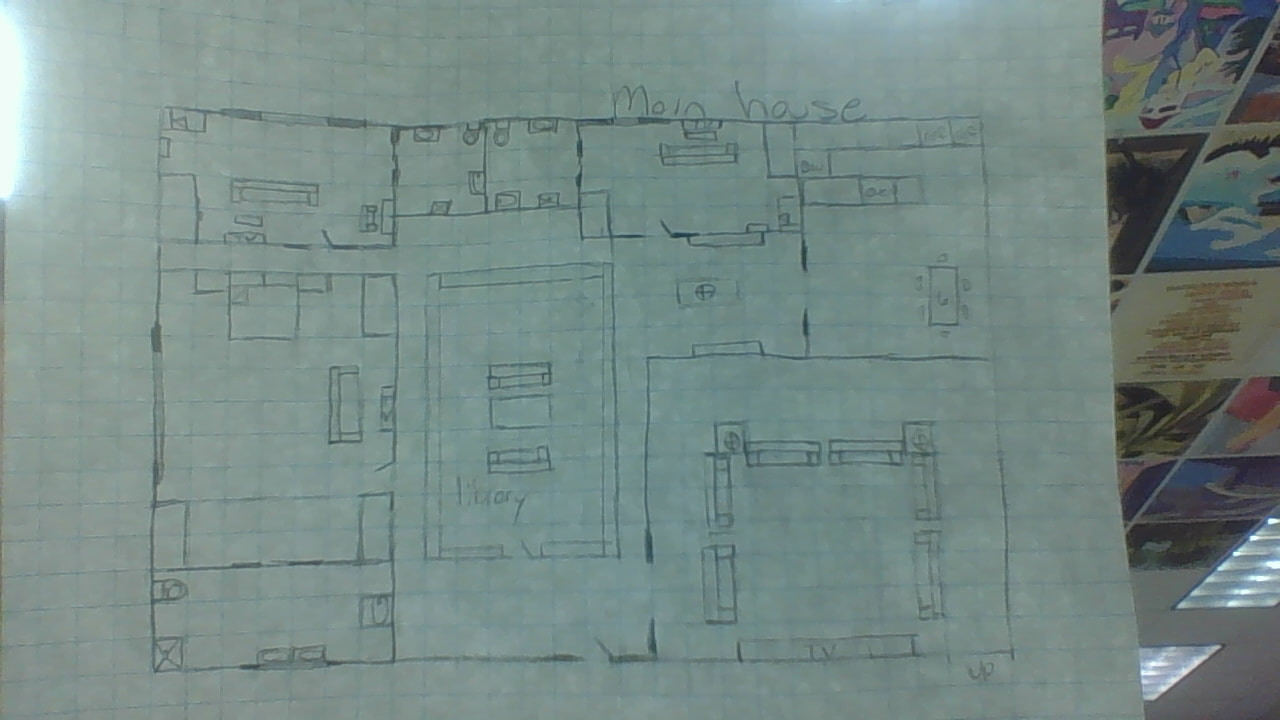
Dream House Drawing
In this project we drew our dream house, but we had to learn perspective first. We learned first, second, and third perspective. To start any of them you draw a straight line. In first perspective you have to lead your all your lines to a single dot/point. In second perspective you lead all of your lines to two points and third to three points. We also made floor plans to get a better idea of how we wanted our house shaped and the size.
I used second perspective to make my houses. We also had to add outside scenery, so I made both of my houses in a tree that was surrounded by a mote. I liked this project and think it turned out well for me.
I used second perspective to make my houses. We also had to add outside scenery, so I made both of my houses in a tree that was surrounded by a mote. I liked this project and think it turned out well for me.
Printing
In this project we are collagraph printing and using the Relief and Intaglio method. To start you have to make a design on a cardboard square. You can use anything you want for your designs from string to a paper clip, but whatever you choose has to be about the same height so it prints correctly. In the Intaglio process you apply your choice of acrylic paint over your square. Then you scrape off the top part where the paint is, leaving out the creases. Then you put it in the printer and compress with the foam piece to make it print. In the intaglio process you roll out ink on a plastic plate and use a roller to collect paint and roll it onto you cardboard square. Then you print it by putting paper over it and pressing down but without the foam piece.I liked this project, but in the future I would use different materials and paints.
In this project we are collagraph printing and using the Relief and Intaglio method. To start you have to make a design on a cardboard square. You can use anything you want for your designs from string to a paper clip, but whatever you choose has to be about the same height so it prints correctly. In the Intaglio process you apply your choice of acrylic paint over your square. Then you scrape off the top part where the paint is, leaving out the creases. Then you put it in the printer and compress with the foam piece to make it print. In the intaglio process you roll out ink on a plastic plate and use a roller to collect paint and roll it onto you cardboard square. Then you print it by putting paper over it and pressing down but without the foam piece.I liked this project, but in the future I would use different materials and paints.
